Pages

Showing posts with label family. Show all posts

Tuesday, December 27, 2016

Christmas for Amelia ~ Vintage babydoll buggy!

Hi all! I hope everyone had a wonderful, magical Christmas! Hard to believe it is over, the time, it just never stops!
 
In general I like to keep things simple, old fashioned and classic. In my own life and also in my daughter Amelia's life. I want her to learn to appreciate things from the past. To love toys that don't scream with loud sounds or blinking screens. My mother was always on a strict budget and my brother, sister and I were raised to know the value of something and to appreciate things/gifts, no matter how small. I guess that is what I'd like to instill in Amelia. I have tried to tell my mother-in-law to keep Christmas simple (present wise), she doesn't need the whole world of toys under the tree! But just being a Babcia (grandma), is to spoil the grandchild. :) So, it's a work in progress....
 
This year I stumbled across the world of Madame Alexander dolls. I loved the look of the hefty weight baby dolls and thought Amelia would love one for Christmas. They range in prices, so I was happy to see that they offer a doll through Toys R Us called the Middleton. She is just precious and I knew Amelia would just love her!!
 
Middleton doll by Madame Alexander
 
 
I tried to wrack my brain and find another tie in to the baby doll gift and soon came to the conclusion that this baby needs a pram!! So the hunt was on. It had to be made of cloth, wood or wicker. Two days of searching later and I found this on Etsy for $42!


She was positively what I was looking for! Wicker, wood and fabric! Woot! Also very, very dirty. Like yucky dirty, but I had to have her. Per the usual which is me procrastinating, I started this fun project the Sunday before Christmas. I worked on it during Amelia's nap times and at night after she went to bed. There were some very late nights there, but I just loved how it turned out.
 
 
First, I took off all the grungy gross fabric and took pictures as I was peeling it off, so I would remember how to put it back together! It was once a very pretty red and white gingham, but was now a sad, dirty, faded color of pink and brown. Yuck. My fingers had a coating of grim after I was done, I couldn't wait to wash them.  Here is a pic of the fabric being disassembled.


After taking it apart, I washed the wicker basket inside and out with dish soap and water and let it dry overnight. I then used a matte polyurethane and sprayed the whole thing. The fun part was taking the old fabric and ironing it to use as a pattern. My iron had water in it and as the steam came through the yucky fabric I had this lovely steam plume of dirt, age and who knows what fill my lungs. Fun times!! I cut out the new fabric. I chose a pretty blue with delicate flowers on it. I'm thinking I'm partial to the color blue, I am now seeing it everywhere in my house. Creeping in like a ninja.
 
 
Then the scary part. Trying to figure out how to put this beast back together again. Love it when I have a time crunch and I am just winging it!! Amazingly it all came together, thank goodness for the many pictures I took of the tearing apart process. I took apart the red and black wheels and painted them ivory and shiny black. Added a soft flannel bedding using blanket stitch and finished it the night before Christmas Eve!
 
 
The back of the hood.
 
 
I had to take apart some of the blanket stitching after finishing because I had forgotten to attach the legs and wheels. Ugh. Whoops.


Here she is all finished!! The night before Christmas Eve! Phew, that was close.


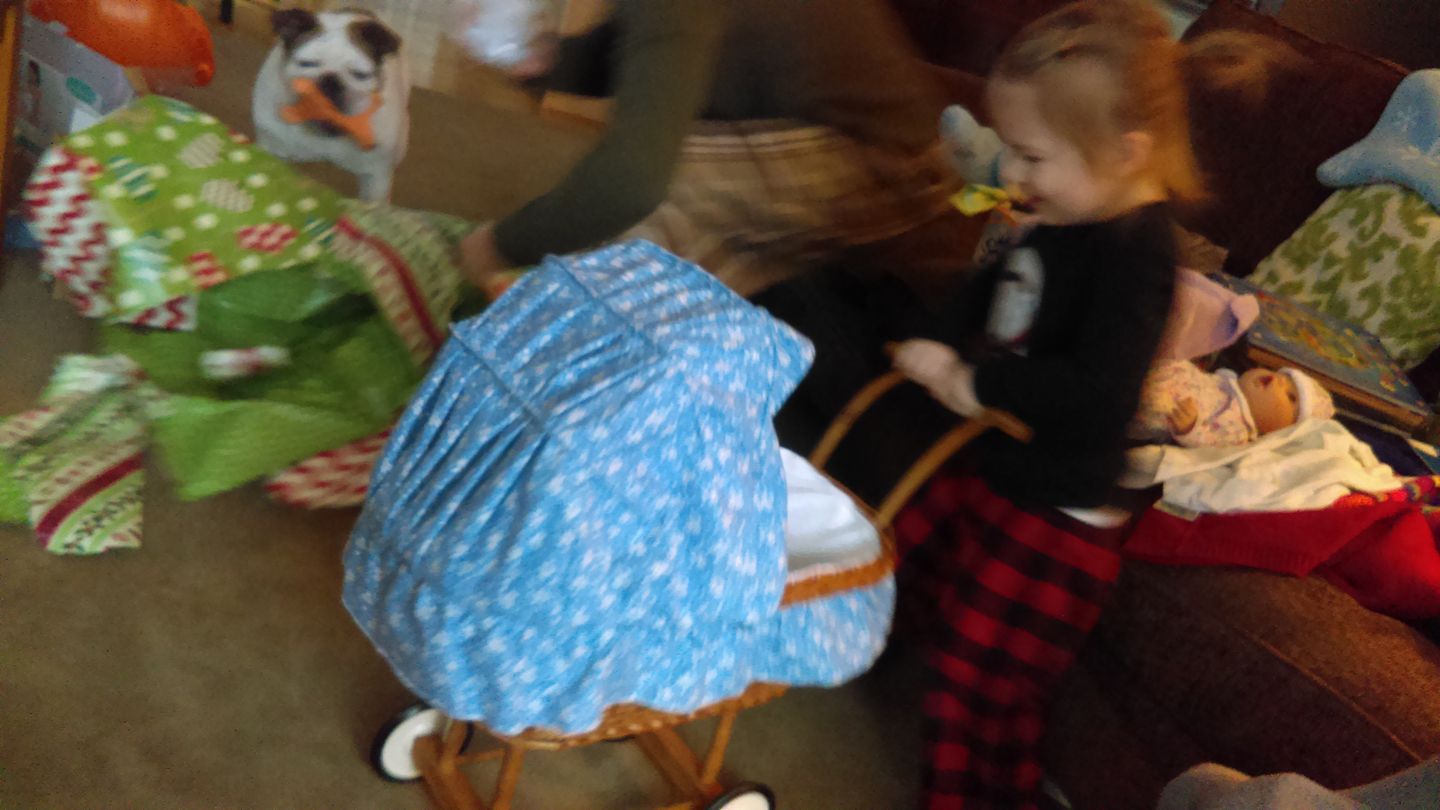
Here is the happy girl on Christmas morning!


She also received many pop-up books from Santa. She calls them her "special books" and that is something that Jeff loves sharing with her. All in all, a great Christmas had by all!  


Tuesday, April 15, 2014

Radio silence a.k.a "So we had ourselves a baby!!"

Sooooo, it's been a while since I have posted. Sorry for the radio silence. We found out we were pregnant in August and my interest in blogging, sewing, diy-ing etc. went downhill from there! A total loss of energy, for everything. Even reading my favorite blogs. That was the only real "illness" during pregnancy. No morning sickness and all around felt good health wise.


At around 9 months pregnant I finally found some energy to do a changing table DIY! It came out great and I will have a post about it soon!

Baby arrived on Tuesday April 8th and we are over the moon happy! So without further adieu.........


Amelia Catherine Dana

 
6 lbs. 12 oz.
21" long


Yep, two middle names! We're fancy like that! Lol, just kidding. I just couldn't leave one out! Catherine for my mom and great grandmother and Dana for Jeff's grandmother.

Now that I am in the stage of the sleep deprived, I am slowly working on the projects of making the crib mobile and also a crib skirt and bed skirt for the nursery. Hopefully they will be done sometime this century! =) I've also gotten back the interest of reading my favorite blogs again, it's so good to be back!!


Sunday, June 16, 2013

Date Night: Oakwood Cemetery Ghostwalk

Hi all! Last night Jeff and I had a wonderful time out with friends. For the 2nd year in a row we went to the Onondaga Historical Association's "Oakwood Cemetery Ghostwalk".


Jeff and I as we waited for our group to start. It has rained for a few days straight so we really got lucky with the weather!


It is a tour through one of Syracuse's largest park like cemeteries. It was built in 1859 by Howard Daniels.
 
 
From Wikipedia
1909 postcard of the old original entrance facade built in 1902, which has been closed off since the building of Interstate 81, years ago. Last summer, Caiden and I had the chance to walk around up there on the elevated railroad track part. Very cool indeed. I will have to find those pictures.


From the website ShadesofOakwood.com:
 
"In the early 1850's a group of prominent men in Syracuse began looking for grounds for a new cemetery. In the forefront of this group were E.W. Leavenworth and John Wilkinson. Meetings were held on and off until the late 1850's when the group began to act. The men were interested in making the new burial ground a rural cemetery, which was a popular cemetery style during that time period. In contrast to burial grounds in the city which were overcrowded, odoriferous, and were prone to vandalism this cemetery was to be an attractive and civilized place to bury one's loved ones. The chosen site encompassed a glacial hill where springs carved valleys around steep slopes forested with massive oaks. The rural cemetery, designed as a series of landscape pictures, was to be a place of spiritual fulfillment for the living as well as a resting place for the dead. An overall picturesque effect was achieved through varied topography, irregular land division, winding roads and paths, and controlled internal views. The rural cemetery was designed to be a place of natural and man-made beauty, where individuals and families could escape their everyday lives and enjoy the surroundings."
 
It truly is a beautiful, peaceful place. While not a traditional "ghostwalk" this was a walking tour where we meet some of Syracuse's famous and infamous that now 'reside' in Oakwood. Portrayed by actors, each person shares their life here in Syracuse and what they did to make them famous. 
 
 
This years inhabitants are:
 
Comfort Tyler (1764-1827)
 
One of the earliest settlers in Onondaga County. He surveyed the land and roads and held a number of political offices. Comfort Tyler was also affiliated and arrested with Aaron Burr for treason, because of surveying land in Texas. The charges were dismissed. Comfort was buried elsewhere but was brought back to Syracuse to be reinterred with family in the Cornelius Tyler Longstreet mausoleum which looks like a pyramid.


Cornelius Tyler Longstreet mausoleum erected in 1875.


Inside the Longstreet mausoleaum. Family or friends could come and visit and lounge on the furniture in the monument. It is completely sealed off now. Source: ShadesofOakwood.com


Milton Price (1825-1889)
 
The Merchant Prince of Syracuse owned a department store located across from his mansion on Salina Street near Jefferson Street. He was known for his wild promotional antics and charitable deeds.


Old advertisement for Milton S. Price store


Milton S. Price in front of his cash register, telling us about his life.


John Wilkinson (1868-1951)
 

 Inventor of the air cooled engine for the Franklin Automobile Company among other automotive inventions. He was also known as a champion cyclist and athlete.


 Wikipedia image


John Wilkinson source:Wikipedia


John Wilkinson telling us about his sporting achievements.


 Wilkinson monument


Dr. George Greeley (1844-1902)
 
Dr. Greeley was a local homeopathic doctor who suffered through a terrible loss of losing his sister, daughter and wife to illness and was unable to save them with his remedies. He was plagued by scandal after scandal for forgery and public intoxication. These events led to him committing suicide on the steps of the Oakwood Cemetery Chapel.


 Oakwood Cemetery Chapel


Dr. George Greeley in the chapel telling us about his terrible choices in life. It was creepy and dark in there.


 This was behind us as we were listening to the Doctor. The walls were lined with them. We weren't told what they were but if we had to guess, some sort of temporary vaults. Did I mention creepy??


Here are some other photo's from our walk through the cemetery.
 
 
Sabey monument built into the hill.


Erie picture of the same monument shown on in the hill.


Weiting monument all grown over.


How Weiting looked in the 1890's.


The Haggerty Lion.


"On November 11, 1982, the Haggerty lion was placed in Oakwood as a memorial to Michael Charles Haggerty who died at age 14 in an auto accident in 1974. His brother Thomas, who was two years younger than Michael, was an art student at Syracuse University when his parents asked him to create a special and original memorial. Michael had always liked lions and his mother thought a lion would be appropriate - a friendly protector, inviting but with claws. Thomas began work on the monument in the summer of 1981. He formed the clay image in his garage, spraying and wrapping his work each night. After this initial phase, the large figure was moved outside of his home and his work was supervised by an Syracuse University instructor. After a year's work, the 620 pound bronze statue was ready for placement. Michael had originally been buried at St. Mary's in DeWitt, but the authorities responsible for the diocese cemeteries objected to the monument. Michael was then reinterred in a special spot at Oakwood with the lion standing guard. Many people do not know about the Haggerty lion because it is situated in a wooded area and during seasons with leaves, it is well concealed. The lion can be found across the road from the Chapel. At the corner where the woods begin is a small trail which leads about 20 feet up a small incline to the monument."


The beautiful monument is completely hidden unless you know where you are looking, I had to be reminded that it was back there.


The old caretaker's office. A huge stone building that is now in shambles. It is kitty-corner from the chapel.


1920 postcard of the caretaker's building.
Source: Wikipedia


Being a genealogist I really love this cemetery. The history and information a cemetery can give a family historian is immeasurable.  We have done some letterboxing in Oakwood also. I loved the monuments so much that our wedding photo's were taken there in 2007!!


I apologize for the fuzzy scanned photo's, it's hard to scan a wedding album!


All photo's were taken at the Chapin monument. It is a huge structure of Greek style columns. Marie and Henry Chapin were wealthy socialites that lived in Syracuse in the early 20th century. It's hard to believe that there are only 2 people buried at such a large structure. It is so beautiful.


source: www.findagrave.com


Google Earth


Well anyhoo, that's my love affair with Oakwood Cemetery. I look forward to next years tour!!


Tuesday, May 28, 2013

Corsage and Boutonniere- Jr Prom 2013

Hard to believe that Caiden is old enough for the right of passage known as the Jr Prom. Where does the time go??
 
 
I decided to make the corsage and boutonniere because after pricing all the fancy ones sold at the local florist ($20 boutonniere and $30 corsage!!??) and because it makes me crazy to pay for something  I knew I could make myself for less money and just as pretty, I took the plunge! 


I went to my local craft stores and picked up the following items:
 
 
Sparkly crystal stretch bracelet
$3.33- A.C. Moore


Black sparkle stretch corsage bracelet (notice the silver metal tabs on it)
$4.99- Joann Fabric


Black 20 gauge wire
$2.99- A.C. Moore


Green floral tape
$1.99 for 2 rolls- Hobby Lobby


Sheer white 1 in ribbon
$2.99- JoAnn Fabrics


Green floral wire
$1.99- Hobby Lobby


I cut up the crystal bracelet and the black wire in 8in lengths. Then bent them into submission using needle nose pliers to make some sparkly doo dads!


Early Saturday morning on the day of the prom I went to our local Wegmans and picked up a dozen coral/peach/pink roses.
$12.00


I didn't take any pictures of the "making progress", but if you go on YouTube and search for "how to make a corsage" about 300 videos show up!! 


I cut 3 roses leaving about a 1 inch stem on each. Then took a piece of floral wire and inserted it into the stem just below the rose, then bent the wire just an inch on one side and longer on the other. Starting were the wire punctures the stem, stretch the floral tape (stretching it before hand makes it stick to itself) while wrapping the rose to cover the bent area fully. Now your rose has a wired and taped stem. This part was a little nerve wracking but only one rose had to sacrifice itself for practice!


For the corsage I took 2 roses and taped a different sparkler to each one. Then taped the 2 roses together adding a couple rose leaves. I then made a bow with the sheer ribbon (also following a YouTube video). Attached a floral wire to make the bow and then taped the bow onto the roses. Every time I taped a new wire to the corsage I cut off the extra wire, once something is taped it's not necessary to have all these wires connected to it. So now there was one stem of taped pieces of different wires. I bent the stem of wires under and out of the way as not to catch on any thing. Then took the corsage bracelet and used the silver metal tabs which bend very easily and CAREFULLY bent the tabs around the the stem of the corsage. You want the corsage to sit evenly on the bracelet and not flop around so make sure it is attached to the heaviest part of the flowers.


Voila!


For the boutonniere the instructions are pretty much the same, minus the bow and bracelet. After taping the sparklers to the rose and adding a leaf, I bent the end of the taped wire around a narrow pencil.


Finished boutonniere! I cut off that green leaf piece that had ripped in this picture.


green piece gone, stem squiggle detail.


The mess afterwards!! I did NOT want to pick this up! Anything not used for the corsage was returned to the store.


I trimmed the stems of the remaining roses and got to enjoy them for a whole week!!


Total cost of construction for the corsage and boutonniere was a total of $21.28! I considered the roses as $1 a piece and I got to enjoy the rest of them for myself....a gift for myself maybe?


Two hours before the prom while I was making the corsage, Caiden called me and asked if I would write "Haley, will you go out with me?" on the ribbon........ how stinkin sweet is that?!! I told him I wouldn't couldn't write on the ribbon but would come up with something else.


I printed out this little tag onto card stock and attached it to the corsage container.


So cute.....she said yes!


And because I'm a crazy person that gets weirded out by having my son's picture on the Internet here is a cropped version of the happy couple. =)


(note: he is holding a Rock Star energy drink, not a beer! lol!) 
Caiden's step mom Christina used 2 different color dyes to make coral Chuck Taylors!! They came out awesome!


Feet!! Caiden and friends.


Eight couples rode in a beautiful 18 passenger white Hummer limo. This vehicle was nicer than the car his father and I used for our wedding!
 
 
The prom was at the high school and the kids had a wonderful night. They rode around in the limo after the prom and went to eat at a local restaurant. Then all the boys had a bonfire at Caiden's best friend Josh's house and slept over.


The morning after.....


 I will definitely make the corsage and boutonniere next year for the Sr. Ball and what's great is I have most of the supplies now!!