Pages

Showing posts with label DIY. Show all posts

Tuesday, December 27, 2016

Christmas for Amelia ~ Vintage babydoll buggy!

Hi all! I hope everyone had a wonderful, magical Christmas! Hard to believe it is over, the time, it just never stops!
 
In general I like to keep things simple, old fashioned and classic. In my own life and also in my daughter Amelia's life. I want her to learn to appreciate things from the past. To love toys that don't scream with loud sounds or blinking screens. My mother was always on a strict budget and my brother, sister and I were raised to know the value of something and to appreciate things/gifts, no matter how small. I guess that is what I'd like to instill in Amelia. I have tried to tell my mother-in-law to keep Christmas simple (present wise), she doesn't need the whole world of toys under the tree! But just being a Babcia (grandma), is to spoil the grandchild. :) So, it's a work in progress....
 
This year I stumbled across the world of Madame Alexander dolls. I loved the look of the hefty weight baby dolls and thought Amelia would love one for Christmas. They range in prices, so I was happy to see that they offer a doll through Toys R Us called the Middleton. She is just precious and I knew Amelia would just love her!!
 
Middleton doll by Madame Alexander
 
 
I tried to wrack my brain and find another tie in to the baby doll gift and soon came to the conclusion that this baby needs a pram!! So the hunt was on. It had to be made of cloth, wood or wicker. Two days of searching later and I found this on Etsy for $42!


She was positively what I was looking for! Wicker, wood and fabric! Woot! Also very, very dirty. Like yucky dirty, but I had to have her. Per the usual which is me procrastinating, I started this fun project the Sunday before Christmas. I worked on it during Amelia's nap times and at night after she went to bed. There were some very late nights there, but I just loved how it turned out.
 
 
First, I took off all the grungy gross fabric and took pictures as I was peeling it off, so I would remember how to put it back together! It was once a very pretty red and white gingham, but was now a sad, dirty, faded color of pink and brown. Yuck. My fingers had a coating of grim after I was done, I couldn't wait to wash them.  Here is a pic of the fabric being disassembled.


After taking it apart, I washed the wicker basket inside and out with dish soap and water and let it dry overnight. I then used a matte polyurethane and sprayed the whole thing. The fun part was taking the old fabric and ironing it to use as a pattern. My iron had water in it and as the steam came through the yucky fabric I had this lovely steam plume of dirt, age and who knows what fill my lungs. Fun times!! I cut out the new fabric. I chose a pretty blue with delicate flowers on it. I'm thinking I'm partial to the color blue, I am now seeing it everywhere in my house. Creeping in like a ninja.
 
 
Then the scary part. Trying to figure out how to put this beast back together again. Love it when I have a time crunch and I am just winging it!! Amazingly it all came together, thank goodness for the many pictures I took of the tearing apart process. I took apart the red and black wheels and painted them ivory and shiny black. Added a soft flannel bedding using blanket stitch and finished it the night before Christmas Eve!
 
 
The back of the hood.
 
 
I had to take apart some of the blanket stitching after finishing because I had forgotten to attach the legs and wheels. Ugh. Whoops.


Here she is all finished!! The night before Christmas Eve! Phew, that was close.


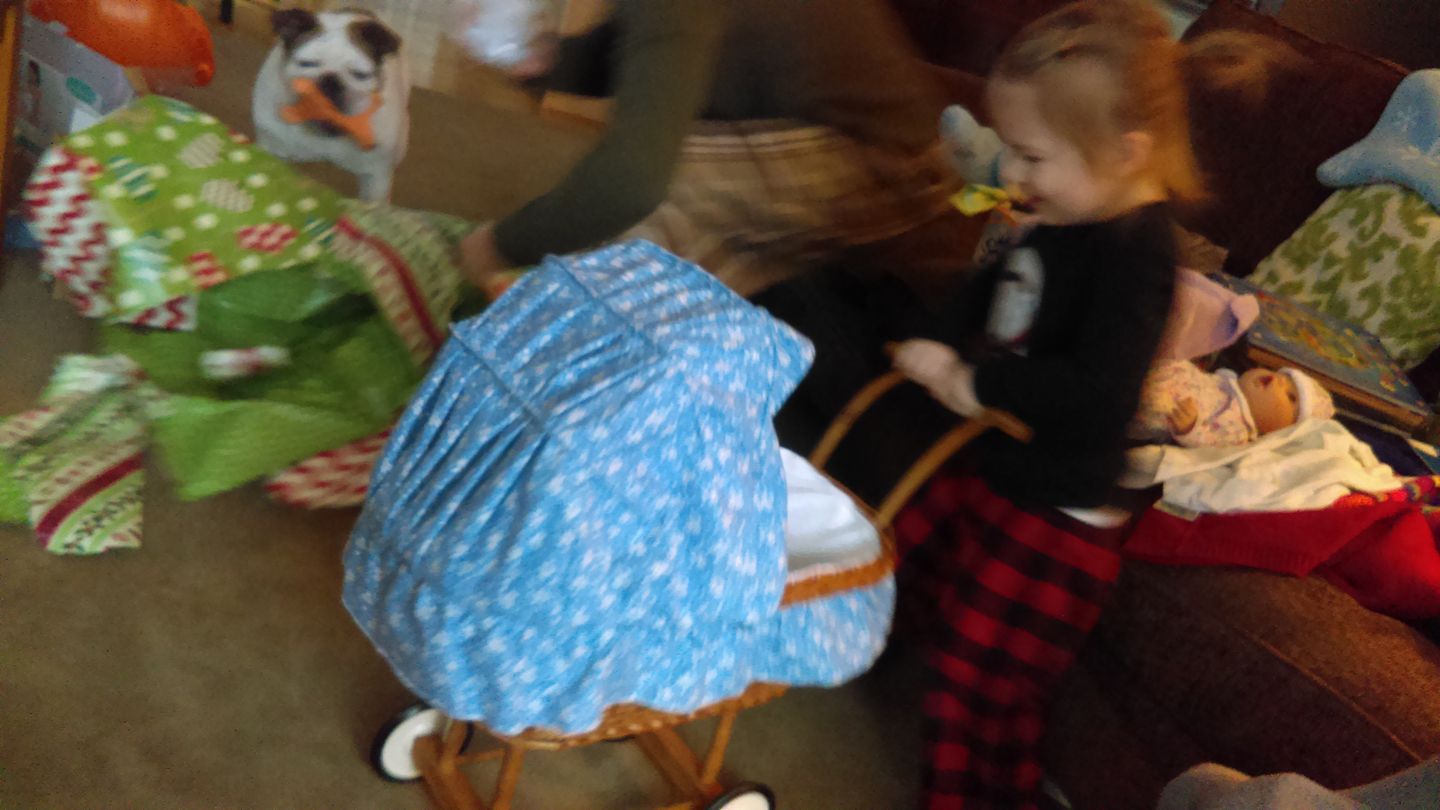
Here is the happy girl on Christmas morning!


She also received many pop-up books from Santa. She calls them her "special books" and that is something that Jeff loves sharing with her. All in all, a great Christmas had by all!  


Thursday, May 22, 2014

Fois Bois Changing Table

Hi all! Amelia is 6 weeks old now and letting me sleep through the night. I don't feel nearly as exhausted as I have felt the first weeks after her arrival. I thought I would finally post my DIY Fois Bois changing table/dresser! Fois bois means "false wood". I have wanted to try this technique for a very long time and it turned out great.

For the nursery I knew I wanted a long dresser to use as her changing table. I had been researching on Pinterest for a while and considered using a mid century dresser. I used to see them ALL THE TIME in the thrift stores, but now that I actually needed one, they were nowhere to be seen. Here are some of my favs from Pinterest.


SIGH.... so seeing as finding a mid century dresser is near impossible, I went back on Pinterest and kept looking. Then I found
THIS......


Wow! Hello beautiful!! I was in love the first moment I saw it! I think it's just beautiful and would go with the other furniture in the nursery. How do I replicate this?? I started by looking for a cheap 6 drawer white dresser. I went to all the local big box stores and didn't see anything. Then I came across this on Amazon.


When I purchased it, it was $172 with free shipping, now it's $192.98....geesh, got lucky there. Well, when it was delivered the box weighed a TON! Did I mention that I was 9 months pregnant when I did this DIY??! I had to have Caiden and his buddy carry it into the house for me.


9 million pieces...no really there were 9 million pieces!!!
 
 
It took 2 days to put it together. My butt was going numb from sitting for so long while doing this project! Here's the after picture. I left off the kick plate piece. I didn't like the way it looked as it took away from the faux mid century look I was going for.


For the fois bois paint treatment, I went to Home Depot and picked up two paint tools, a "wood grain rocker" and a "graining comb" both made by the Martha Stewart brand in the paint department. I did a google search on how to do the fois bois technique. It definitely takes some practice! I recommend having some large cardboard on hand to practice on. Start with a coat of primer, I like Zinnser Cover Stain Oil based primer. The dresser is laminate, so I had to finish it with 4 coats of oil based polyurethane in satin finish.


waiting for each coat to dry!


I wanted to replicate the drawer pulls that were on the original dresser but while searching the Internet, all I found were very pricey options.... not in my budget. Then thankfully I found this tutorial from Sarah M. Dorsey Designs, for DIY ring pulls. AWESOME!!


I found all the materials at Home Depot, and YES! they were made for under $2.00!! I used nickel instead of brass and they came out really nice. I love it when people come up with awesome alternatives!
 
Here's the finished product! I love how it came out! The paint and topcoat have been very durable. I'm so glad I didn't settle on just a regular, boring changing table. This fits the room perfectly.


LOVE!!


Next projects: Babushka crib mobile, twin bed skirt and crib skirt!!


Thursday, June 13, 2013

Project: White House Black Shutters and Red Door!

I have mentioned before that Jeff and I have been in our house for almost 6 years.... (we moved in on Halloween day of 2007, lol, my favorite holiday!!) and while we have been slowly getting the inside to reflect our personalities, the outside is still the same sad color of mustard yellow with red shutters. Since day one I have wanted to paint it!! For a while I was leaning towards a very modern gray color but I just wasn't sure, something was holding me back. Well, since taking Caiden back and forth to work through a very beautiful neighborhood daily, I saw the color scheme that I absolutely love..... white house, black shutters and a red door.... a totally classic color for a vintage loving gal, it now totally makes sense to me.
 
Jeff surprised me with this house on our wedding day, we had been living in an apartment for years. To say I was surprised is an understatement. It was the sweetest thing the man had ever done, and how he kept it a secret is beyond me. It is 6 blocks away from my ex husbands house, so my son could ride his bike back and forth to each house and be around his friends. We are in a great community and excellent school district! It's really been a wonderful place to raise Caiden and give him memories and family traditions that he can pass on to his own family someday.
 
 
Here are the only pictures I have of the outside of our house (I'm not sure why that is???). Sorry for the terrible photos. They are scanned copies of the print out Jeff gave me when he surprised me at the church! (Pictures taken by the previous homeowner.) We have changed some of the landscaping a bit. The development we live in was started in the 1970's and our home was built in 1978. It is a raised ranch style house and totally devoid of character, not the style of house I would have picked out, but it is not our forever home either, and the fact that Jeff totally surprised me with it alone make me love it!! I am enjoying myself with the decorating and DIYing that comes along with home ownership. :)


We are a corner house with a large side yard and front yard.


Large backyard with pool, 4 season room, 2 story deck and patio. We didn't want the hot tub so the previous homeowners took it with them.


Close up of deck area, we want to strip the paint (that is now sun damaged) and stain the deck and possibly replace the railings, but we are not sure on that one.


So here are some examples of homes I found on Pinterest with the colors I am dreaming of now!! It just screams classic, traditional, americana.... all things I love!


All beautiful houses.


 This picture gives me a glimpse of what it would look like painted white. I will add character to this house if it kills me!!
 
 
I think we will start painting in the spring, once some of our flower beds have gone to sleep and a tree on our side yard loses it's leaves. I am very excited to get started on the BIG project of painting, but at least there are a few little projects to do now that will add to the beautiful exterior I imagined! :)
 
I will keep you updated along the way!


Monday, June 3, 2013

Finished Dress!! The Great Gatsby Sewing Challenge!

Wow, I never thought I would get this dress finished! Thank goodness Erin from Miss Crayola Creepy extended the deadline from the end of May to June 4! Woo hoo! I was feeling rushed there as this month came to an end. Somehow the whole month of May flew by as we got busy with other projects like our house appraisal and Caiden's prom!
 
In this post I showcased a bunch of different patterns that could be used as a 20's style dress. In the end I chose Vogue V8814 


well ...... after looking at all the beautiful 1920's dresses on Pinterest and as time went on I started thinking that maybe I wanted to do a straight dress to show off the print on the fabric.


Drat. Back to the drawing board!  


I decided to tackle one of Mrs. Depew's ebook patterns for 1920's Tunic Blouse or Dress #3024.


These type of patterns actually have no paper pattern at all! What??!! Crazytown, I know!  This was something I have never tried before and it kinda freaked me out! I like guidance.... my hand being held along the way..... this commando style of dressmaking was scary to me.... but, as I read the directions, my fears went away and I felt more comfortable, that I could do this! It is basically a series of instructions on how to fold the fabric a particular way while using pins to mark your measurements on the folded fabric. Pretty cool. Here's a pic of my practice muslin and markings for each measurement.


In the end I did take it in a smidge in the bust area..... as it is a straight line dress my measurements of a 34" bust and a 38" hip had me swimming in the dress up top!
 
Here she is......


I'm trying to convince Jeff that I NEED my hair this short!


After the final fitting I absolutely LOVE how it turned out! It is so comfy and I can't wait to wear it to the salon. I want to find some other fun fabric and make a few more! Thank you Miss Crayola Creepy for creating this challenge!!


Tuesday, May 28, 2013

Corsage and Boutonniere- Jr Prom 2013

Hard to believe that Caiden is old enough for the right of passage known as the Jr Prom. Where does the time go??
 
 
I decided to make the corsage and boutonniere because after pricing all the fancy ones sold at the local florist ($20 boutonniere and $30 corsage!!??) and because it makes me crazy to pay for something  I knew I could make myself for less money and just as pretty, I took the plunge! 


I went to my local craft stores and picked up the following items:
 
 
Sparkly crystal stretch bracelet
$3.33- A.C. Moore


Black sparkle stretch corsage bracelet (notice the silver metal tabs on it)
$4.99- Joann Fabric


Black 20 gauge wire
$2.99- A.C. Moore


Green floral tape
$1.99 for 2 rolls- Hobby Lobby


Sheer white 1 in ribbon
$2.99- JoAnn Fabrics


Green floral wire
$1.99- Hobby Lobby


I cut up the crystal bracelet and the black wire in 8in lengths. Then bent them into submission using needle nose pliers to make some sparkly doo dads!


Early Saturday morning on the day of the prom I went to our local Wegmans and picked up a dozen coral/peach/pink roses.
$12.00


I didn't take any pictures of the "making progress", but if you go on YouTube and search for "how to make a corsage" about 300 videos show up!! 


I cut 3 roses leaving about a 1 inch stem on each. Then took a piece of floral wire and inserted it into the stem just below the rose, then bent the wire just an inch on one side and longer on the other. Starting were the wire punctures the stem, stretch the floral tape (stretching it before hand makes it stick to itself) while wrapping the rose to cover the bent area fully. Now your rose has a wired and taped stem. This part was a little nerve wracking but only one rose had to sacrifice itself for practice!


For the corsage I took 2 roses and taped a different sparkler to each one. Then taped the 2 roses together adding a couple rose leaves. I then made a bow with the sheer ribbon (also following a YouTube video). Attached a floral wire to make the bow and then taped the bow onto the roses. Every time I taped a new wire to the corsage I cut off the extra wire, once something is taped it's not necessary to have all these wires connected to it. So now there was one stem of taped pieces of different wires. I bent the stem of wires under and out of the way as not to catch on any thing. Then took the corsage bracelet and used the silver metal tabs which bend very easily and CAREFULLY bent the tabs around the the stem of the corsage. You want the corsage to sit evenly on the bracelet and not flop around so make sure it is attached to the heaviest part of the flowers.


Voila!


For the boutonniere the instructions are pretty much the same, minus the bow and bracelet. After taping the sparklers to the rose and adding a leaf, I bent the end of the taped wire around a narrow pencil.


Finished boutonniere! I cut off that green leaf piece that had ripped in this picture.


green piece gone, stem squiggle detail.


The mess afterwards!! I did NOT want to pick this up! Anything not used for the corsage was returned to the store.


I trimmed the stems of the remaining roses and got to enjoy them for a whole week!!


Total cost of construction for the corsage and boutonniere was a total of $21.28! I considered the roses as $1 a piece and I got to enjoy the rest of them for myself....a gift for myself maybe?


Two hours before the prom while I was making the corsage, Caiden called me and asked if I would write "Haley, will you go out with me?" on the ribbon........ how stinkin sweet is that?!! I told him I wouldn't couldn't write on the ribbon but would come up with something else.


I printed out this little tag onto card stock and attached it to the corsage container.


So cute.....she said yes!


And because I'm a crazy person that gets weirded out by having my son's picture on the Internet here is a cropped version of the happy couple. =)


(note: he is holding a Rock Star energy drink, not a beer! lol!) 
Caiden's step mom Christina used 2 different color dyes to make coral Chuck Taylors!! They came out awesome!


Feet!! Caiden and friends.


Eight couples rode in a beautiful 18 passenger white Hummer limo. This vehicle was nicer than the car his father and I used for our wedding!
 
 
The prom was at the high school and the kids had a wonderful night. They rode around in the limo after the prom and went to eat at a local restaurant. Then all the boys had a bonfire at Caiden's best friend Josh's house and slept over.


The morning after.....


 I will definitely make the corsage and boutonniere next year for the Sr. Ball and what's great is I have most of the supplies now!!